
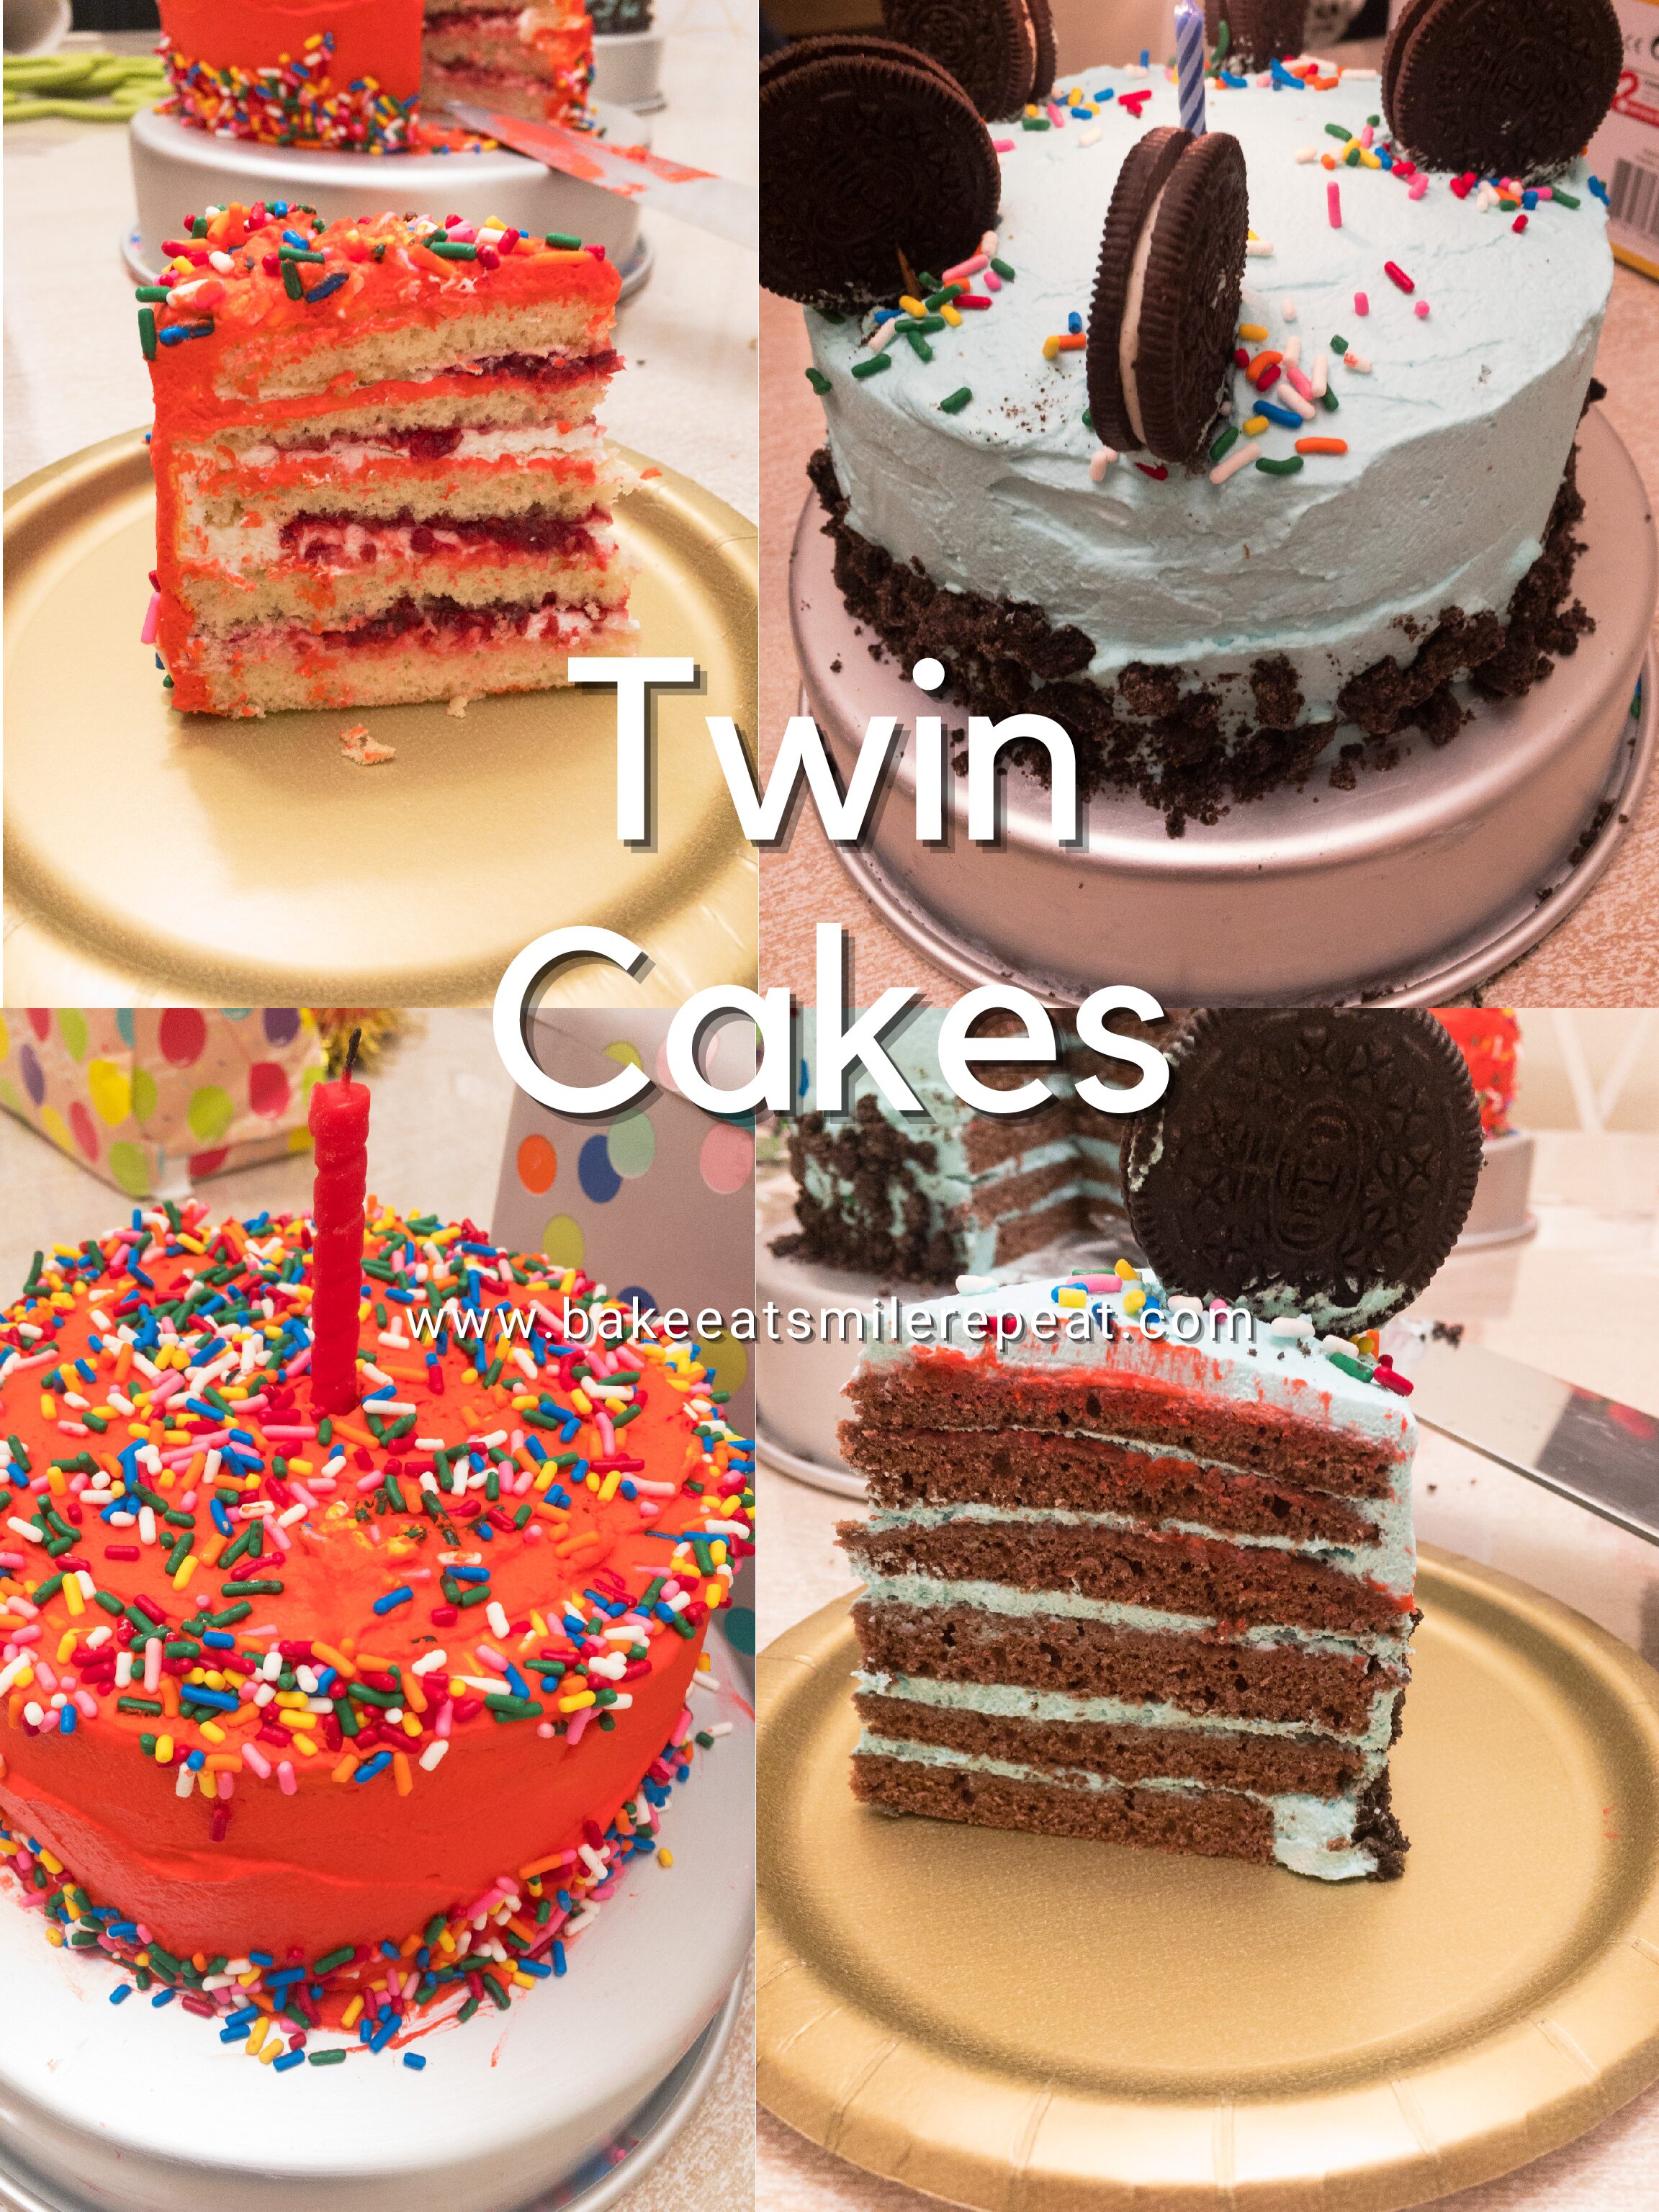
I’ve been wanting to create a tutorial for simple mini layer cakes on the blog for a while. I’ve hesitated because I really didn’t want to provide some set of instructions that required you to buy a ton of mini cake pans, cake rings, or other unnecessary equipment. I finally tooled around with a sheet pan cake and found that the layers, when trimmed out with a cookie cutter and briefly frozen prior to frosting, are actually pretty decent to work with. These mini layer cakes aren insanely easy to make, and taste even better than layer cakes! Follow this tutorial closely for an easy cake! PS this makes 2 mini cakes, you can follow one of the recipes for 1 of them 🙂

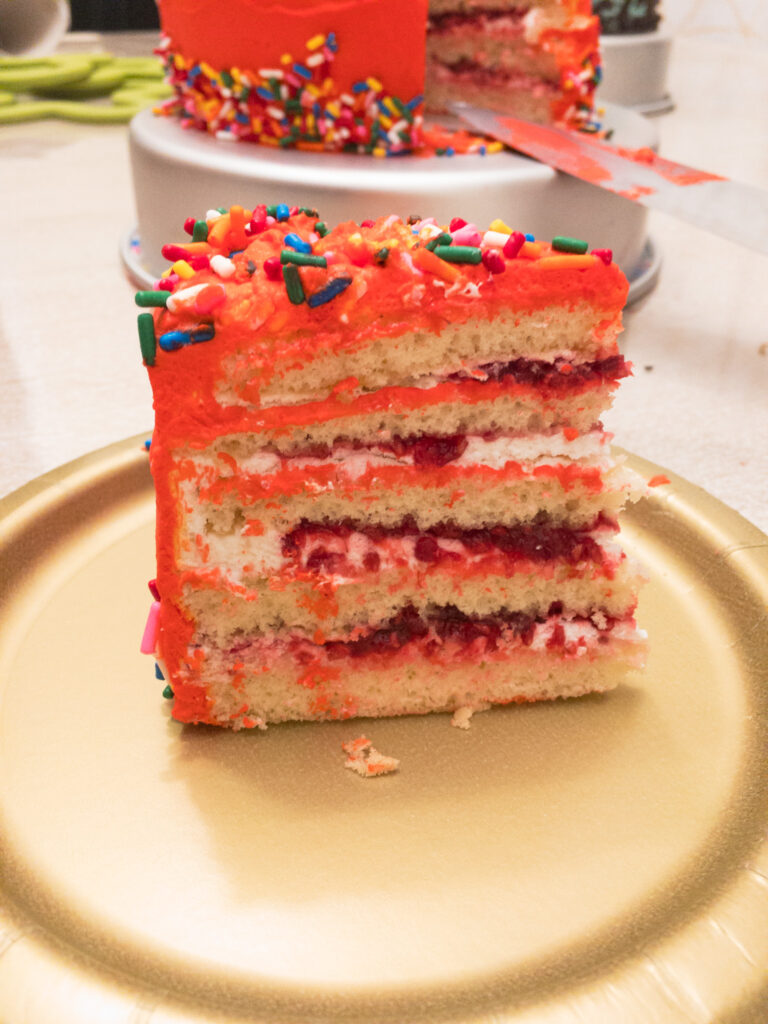
Vanilla with raspberry 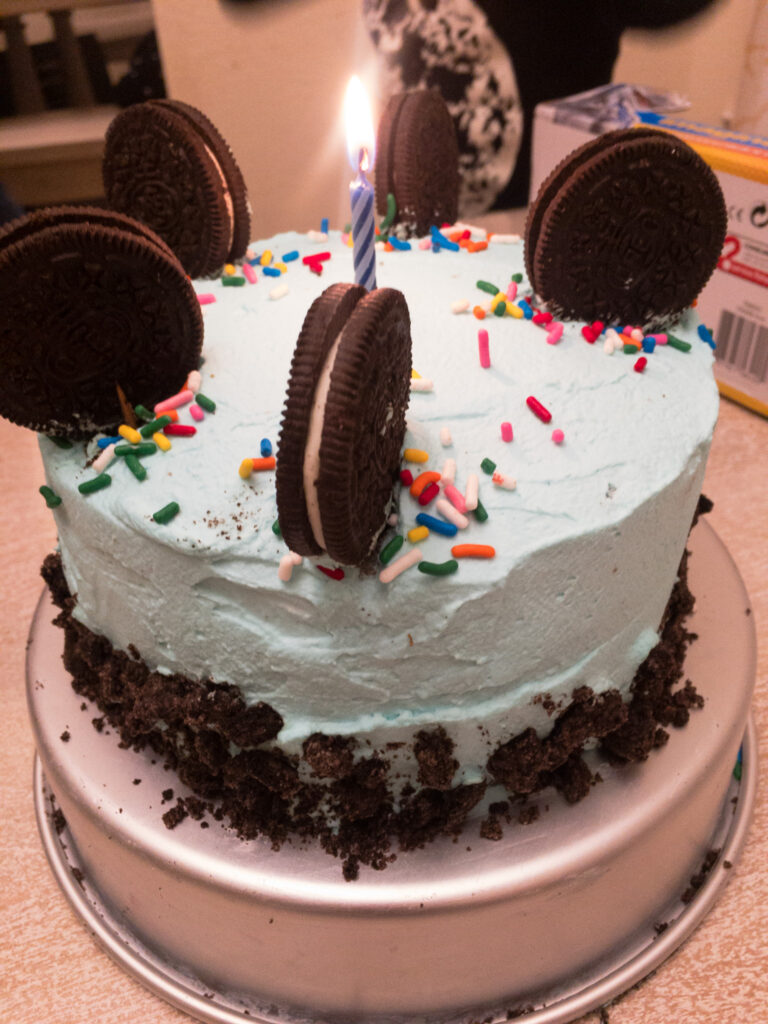
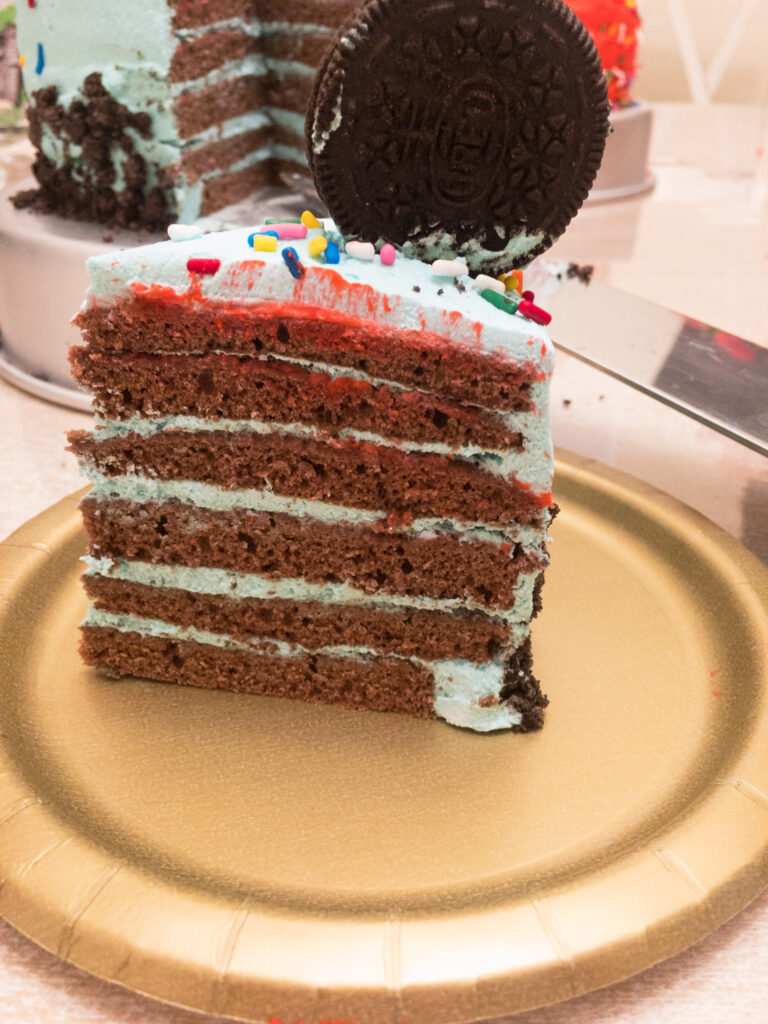
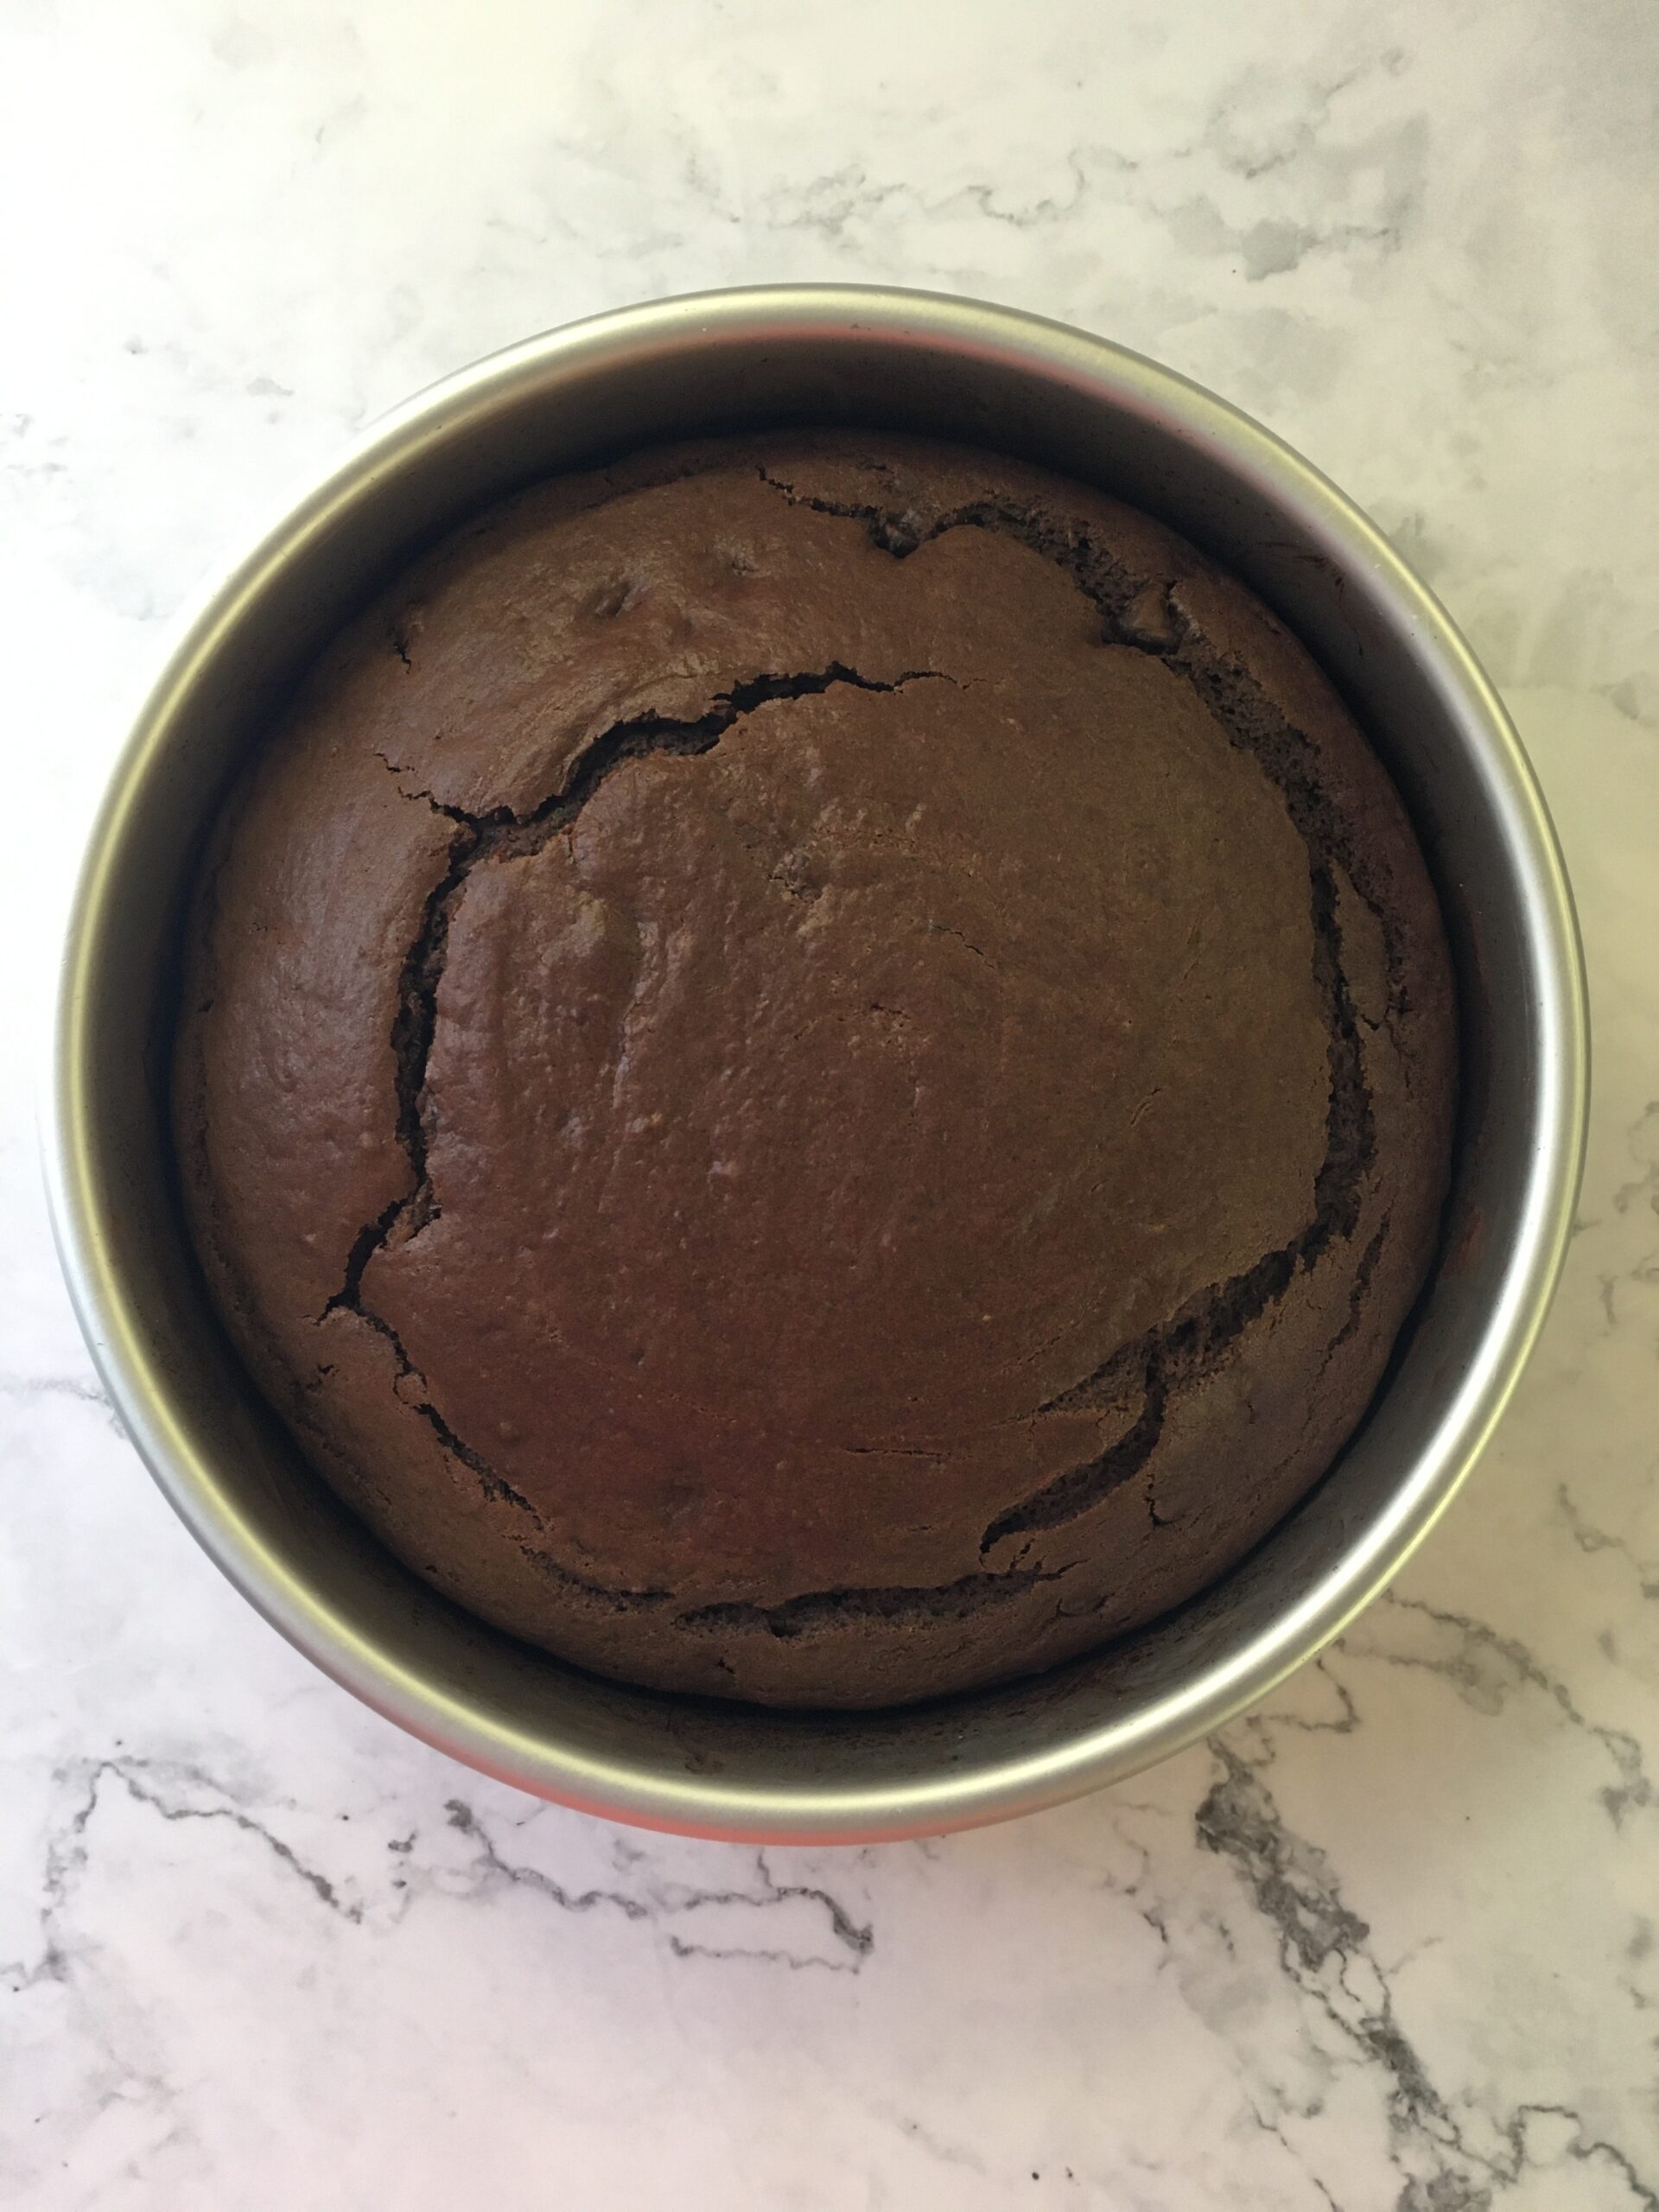
Chocolate cake
How to make the mini cakes?
- First, make the 2 cakes. (I make 2 batches of the same batter ten add in 2 heaping tablespoons of cocoa and some milk to loosen it. The fluffiness relies on the whipped egg. No separation required!);
- But each cake into a sheet and bake for 10-12 minutes and no more than that;
- Let the cakes cool, then, cut out 5 in circles with a cookie cutter or trace a bowl;
- Freeze them for 10 minutes as you make the whipped cream;
- Whip the whipped cream. (optional: color it with gel food coloring);
- Decorate your cakes using a turn table and offset spatula.;
- Chill for 1-3 hours;
- Enjoy
Decoration.
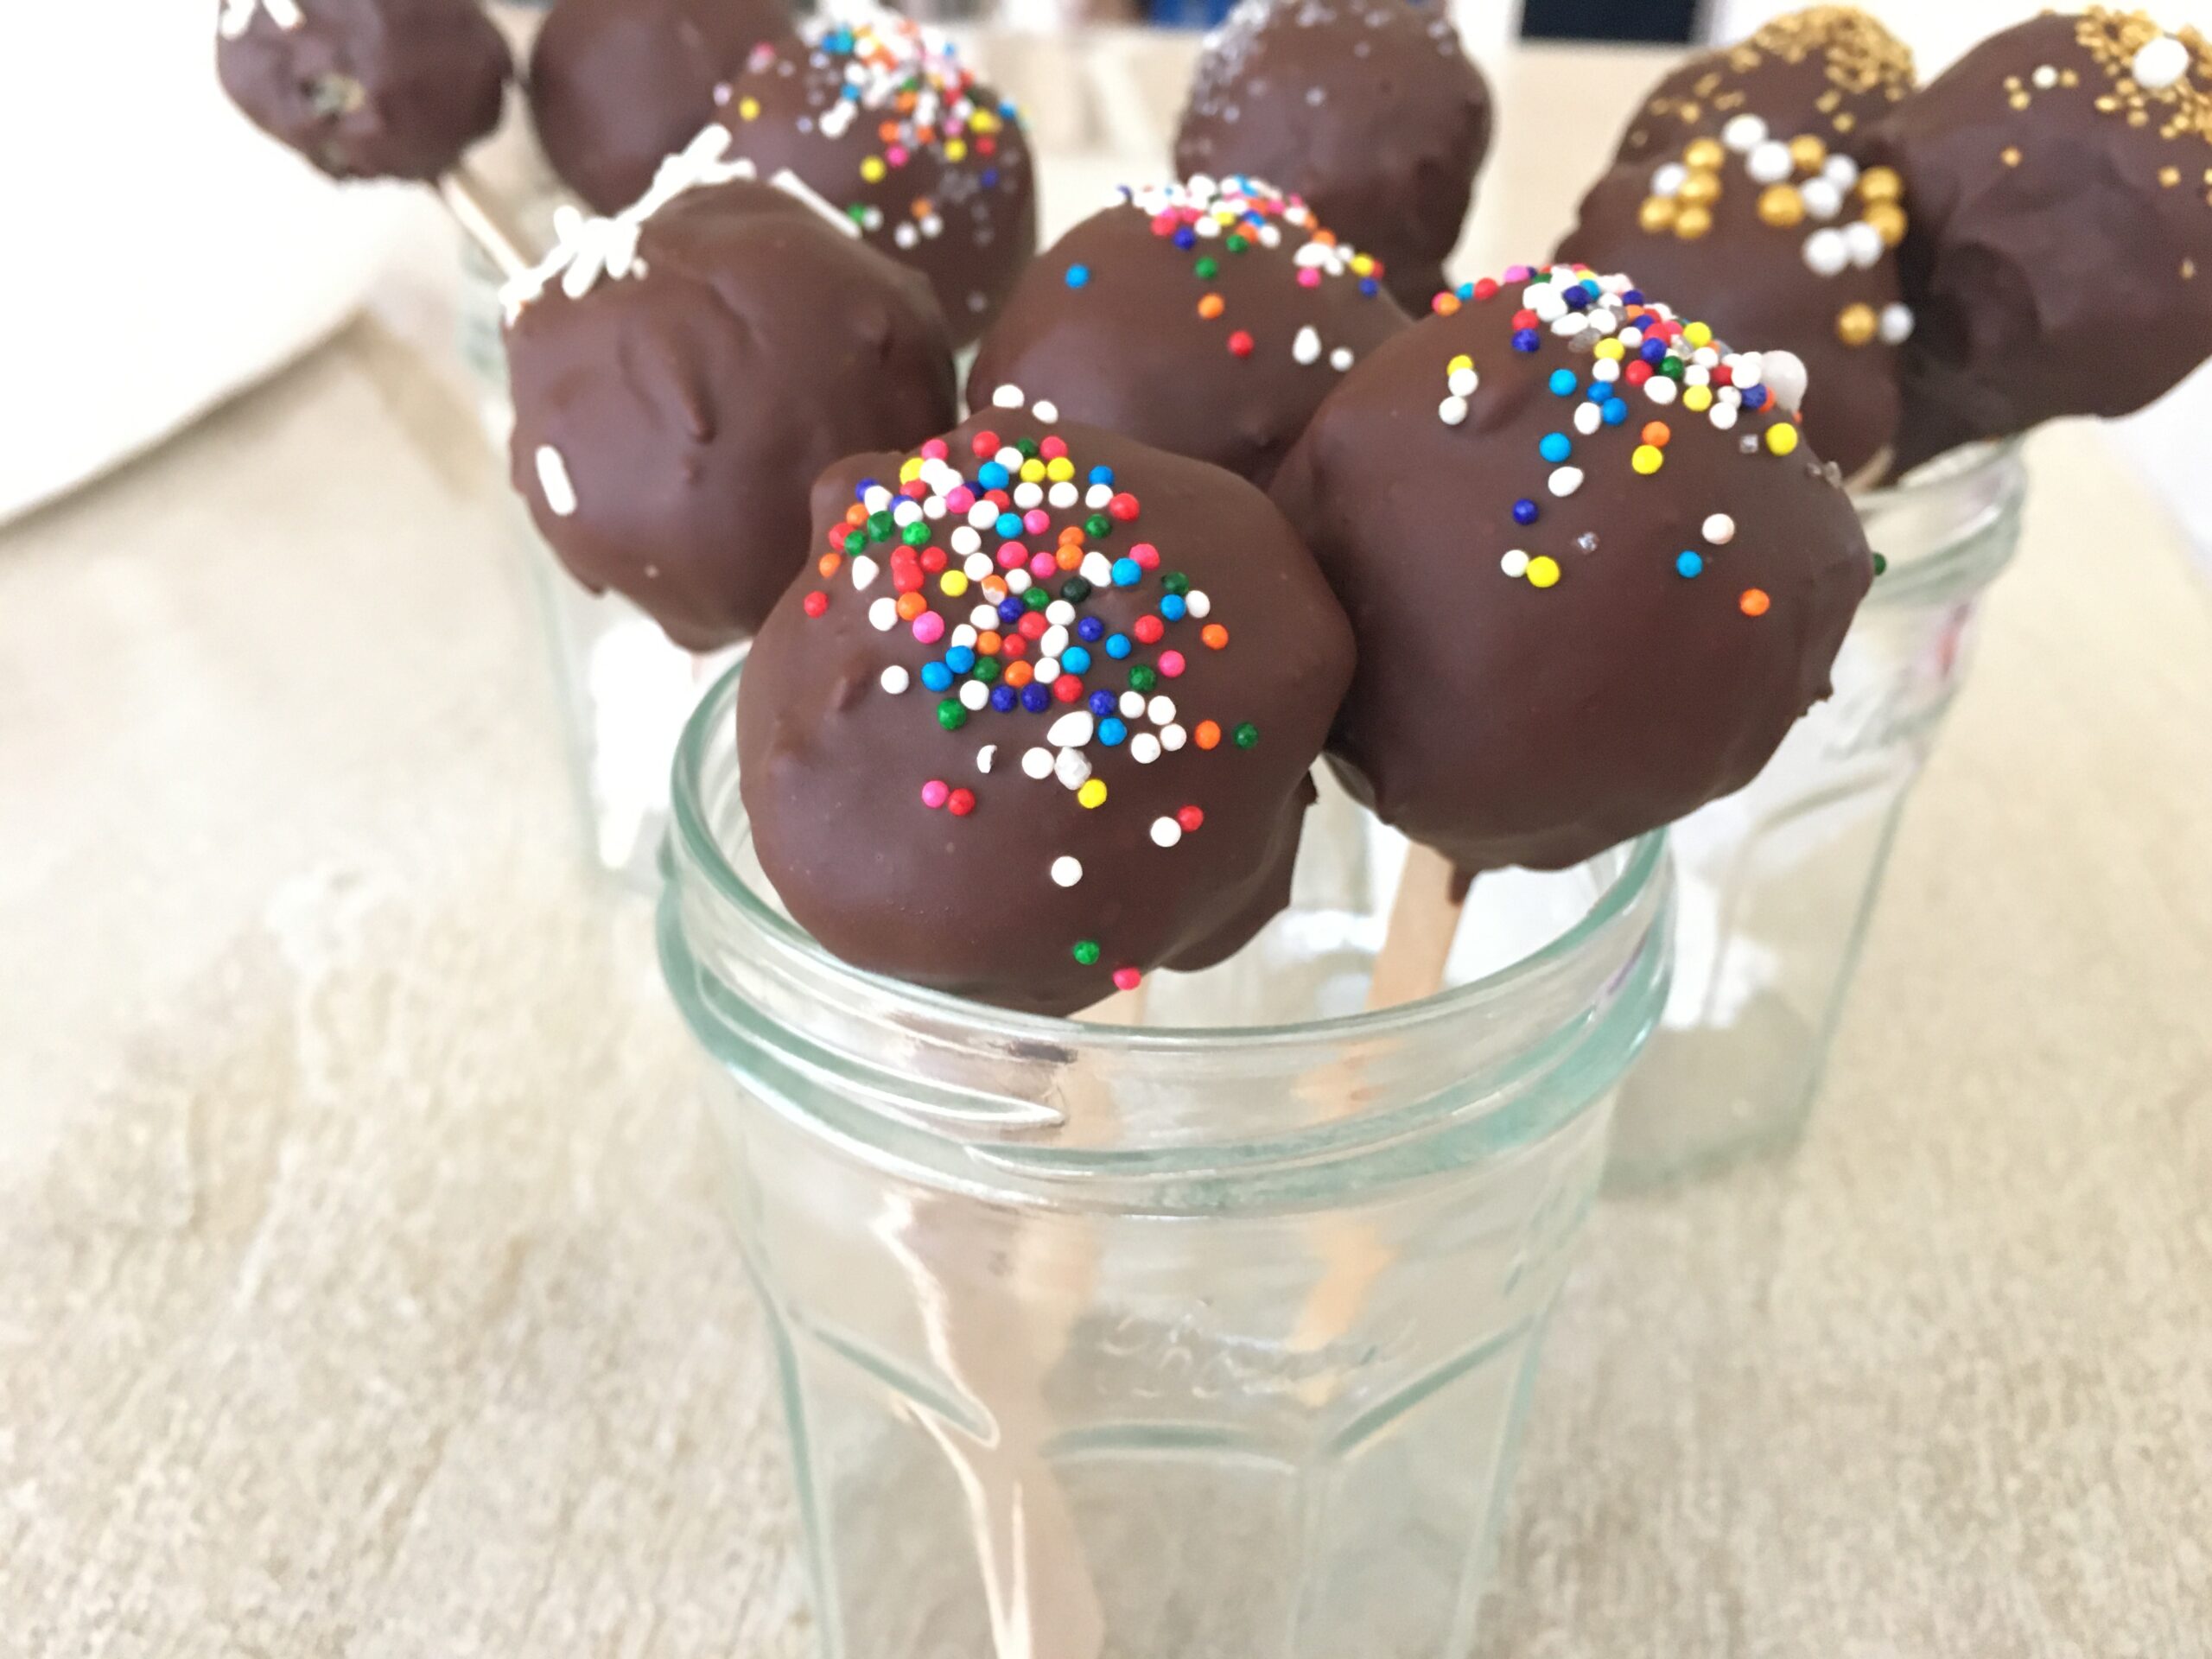
These cakes were requested for two little twins who had wanted bright colors, I used a lot of “Christmas red” red food coloring and some “orange” for the orangish red can. For the blue one, I used a bit of “sky blue” food coloring. I recommend the Wilton jar food colorings. I personally, would have liked to have a pastel colored cake, you can do whatever you would like 🙂 I decided to garnish the cakes with sprinkles and cookies for the little twins 🙂
CLAIMER: NO AFFILIATE LINKS ARE ON THIS BLOG POST.
Frosting & Layers:
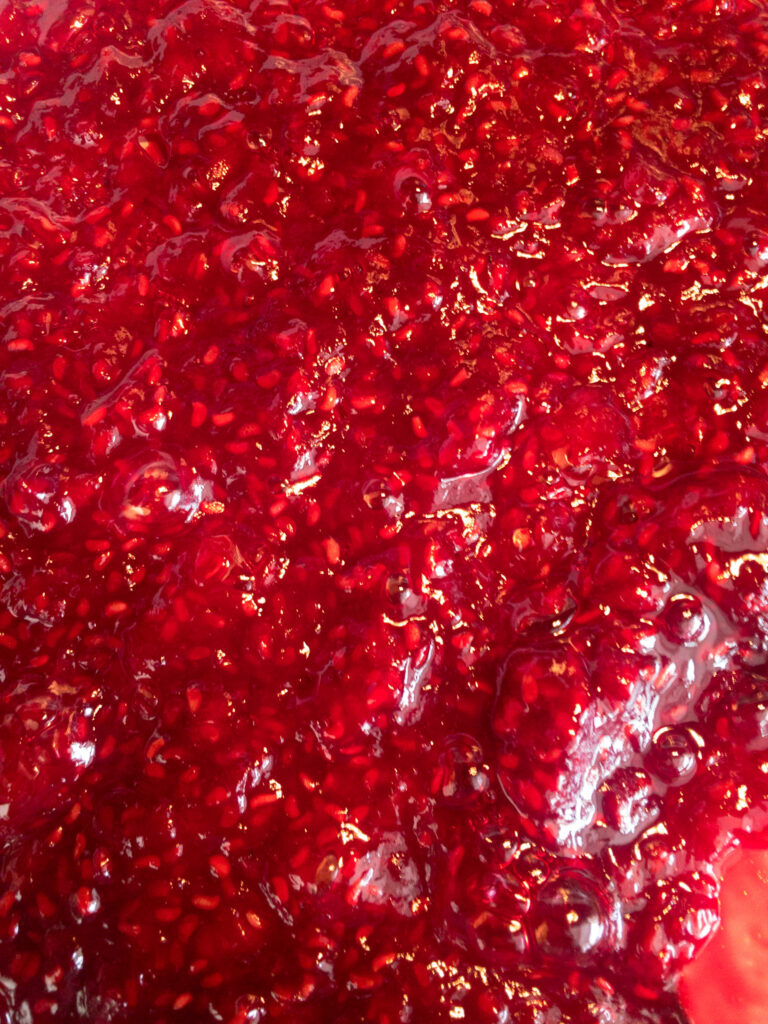
You might end up with 5-7 layers depending on how you cut out your layers. I used whipped cream frosting which is included int he recipe. You can also use buttercream (American, French, Italian) or whatever type of frosting you would like. In my vanilla cake I added some raspberry jam which is homemade and also included int he recipe below 🙂
Make sure you frost the cake evenly for an esthetic look. You can also add some jam to the chocolate cake and color your frosting any color you want!
I promise these cakes are 2x worth the effort and taste great! These are perfect for any event and very easy to customize! Good luck bakers!

Mini Twin Layer Cakes
Equipment
- 4 bowls
- offset spatula
- Sheet cookie pan.
Ingredients
For the vanilla cake
- 4 large eggs
- 3/4 cup granulated sugar
- 2 tbsp lemon zest
- 1 and 1/2 tsp pure vanilla extracts
- 2 and 1/2 tbsp Vegetable oil
- 1 cup all-purpose flour
- 1 tsp baking powder
- 1/4 tsp salt
For the raspberry jam filling:
- 1 cup raspberries
- 1/4 cup lemon juice
- 1/4 cup granulated sugar
For the whipped cream
- 3 cups Heavy whipping cream cold
- 1/4 cup Powdered sugar
- 1 tsp pure vanilla extract
- 1/2 tbsp corn starch
For the chocolate cake
- 4 large eggs
- 3/4 cup granulated sugar
- 1/2 tsp pure vanilla extract
- 2 1/2 tbsp vegetable oil
- 1 cup all purpose flour
- 1 tsp baking powder
- 3 tbsp dutch-process cocoa powder heaping tbsp
- 3 tbsp whole milk, at room temperature or any type of milk
- blue, red and orange food coloring optional
- cookies (oreo) and sprinkles garnish
Instructions
For the vanilla cake:
- Preheat your oven to 350°F or 177°C. Grease and line your 9×13 sheet pan.
- Prep your dry ingredients: in a bowl combine your flour, salt and baking powder.
- Whip your eggs on high speed for about 5 minutes until thick and light in color. Add in your sugar, oil, zest and vanilla. Whip until just a bit more thick. Sift in your dry ingredients and mix just until combined. Make sure that there are no air pockets.
- Spread onto your sheet pan and bake for 10-12 minutes until a tooth pick comes out clean…
For the chocolate cake:
- Keep your oven preheated. Grease and line another sheet pan.
- Prep your dry ingredients: In a bowl combine your flour, baking powder, salt and cocoa powder.
- Whip your eggs on high speed for about 5 minutes until thick and light in color. Add in your sugar, oil, and vanilla. Whip until just a bit more thick. Sift in your dry ingredients and mix just until combined. Make sure that there are no air pockets. Add in your milk until it is the consistency of cake batter. 3 tbsp should be enough.
- Spread onto your sheet pan and bake for 10-12 minutes until a tooth pick comes out clean…
Prep:
- Let both of your cakes cool to room temperature.
- Using a 5 in cookie cutter cut out the cakes into circles and freeze while you mke the frosting.Please see the note.
For the whipped cream:
- Whip the whipped cream, sugar, vanilla, and corn strach until it is a spreadable consitency. Like frosting 🙂 You can color your frosting if you woulkd like 🙂Please see the note
For the raspberry jam:
- Add our raspberries, lemon juice and sugar into a sauce pan and cook down until it is a spreadable consistency. Cool the jam.
To decorate both cakes:
- Set a layer onto a turntable and between each layer evenly spread on about 1/4 of a cup of frostin. For the vanilla cake add a thin layer of raspberry jam on the whipped cream. For both cake: give a thin outside coat of frosting to lock int he crumbs, the layer should be see through. Chill the cake in the freezer to set tht coat. Finally, cover both cakes with the rest of the frosting. Chill for an hour and enjoy!!
Notes

My twin brothers love these 🙂